

Surfaces
Introduction
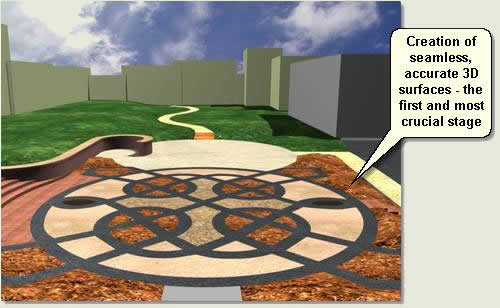
The first and perhaps most crucial stage in creating a 3D landscape scene is the creation of accurate and seamless surfaces. The creation of edges and positioning of objects after this stage is comparatively straightforward. The process becomes more straightforward when you begin to understand what particular method of surface creation is appropriate for particular types of 2D lines from AutoCAD
This section explores a number (not all) of techniques for creating quick and accurate surfaces from 2D lines using the training drawing and should give the user a feel for the range of tools available
Download Sample Data
kf302_files.zip (969kb)
Scene Setup
- Firstly, set the scene up as described in 'Scene Setup'. Below is a checklist to remind you
Checklist:
Custom User Interface
- Viewport Background Colour
- Modifier Button Sets
- Toolbars
Viewport Configuration
- Viewport Layout and Views
- Show Grid (off)
- Smooth + Highlights > Wireframe
- Force 2-Sided in Display Render and Output Render
- Render Background Colour
- Ambient Light
TIP: Create a Custom User Interface and save as the MAX/VIZ StartUI.cui as described in ‘Scene Setup/Custom User Imterfaces’ so that you do not have to do this every time you start a project
Scene Settings
- Configure Paths (Scenes and Import)
- Spinner Snap
- Render Settings for Modelling
- Open kf302_01.max. This scene has all geometry from AutoCAD already imported
- Refer to the ‘Working with Objects’ tutorials for advice on the following procedures:
Meadow
- Select Contours meadow
- Turn the contours into a terrain object
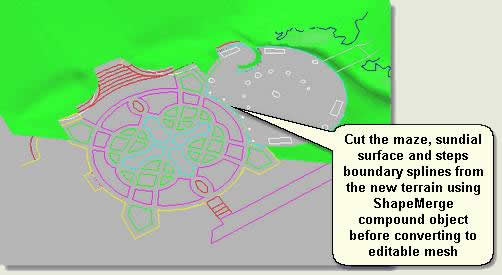
- Use ShapeMerge compound object to cut Bdy Sundial, Wall.01, Wall.02, Wall ends.01, Wall ends.02 and the boundaries for top the six top steps from the terrain
- Convert the shapemerge object to an editable mesh and rename Meadow surface
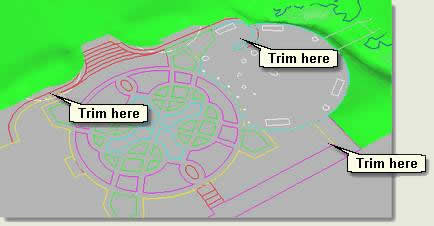
- Trim faces from the walls and other surfaces using face sub-object mode
Paved Areas
The paved areas are created by turning some boundary splines into editable meshes, using the Subdivide modifier to create more faces and using the Shapemerge compound object to cut and surface inner paved areas
Meadow Path
- Select Meadow surface
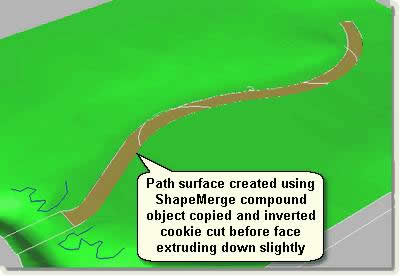
- Create a Shapemerge object using the Cookie Cutter option and using Bdy meadow path as the shape
- Copy clone the ShapeMerge object
- Invert the Cookie Cutter option on the copied ShapeMerge object and rename the new ShapeMerge object Meadow path surface
- Convert the meadow surface and path surface to editable meshes and apply a different object colour to the path so that you can readily see it in the viewport
- Select the meadow path
- In face sub-object mode select all faces from the path and apply a Face Extrude modifier
- Extrude to -0.1, then convert to an editable mesh. This give the path some relief below the meadow surface
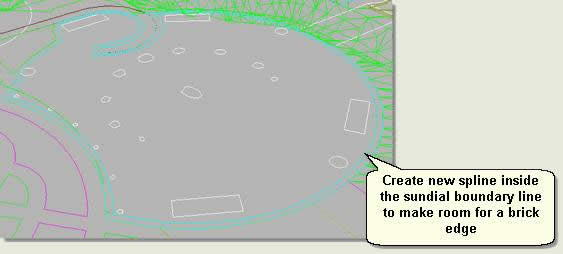
Sundial Surface
- Select Bdy sundial surface and create an outline in spline sub-object mode of 0.2m
- Detach the new spline and rename Sundial surface
If this is now converted to an editable mesh the operation will fail. This is because the outline operation produces intersecting vertices. To correct this situation the vertices must be welded thus:
- Select Sundial surface spline
- In Vertex sub-object mode select all vertices and Weld, keeping the threshold at 0.1. Exit sub-object mode
- Utilities Panel > More > Shape Check - Press Pick Object and pick the spline. This displays ‘Shape Ok’ if there are no intersecting vertices and ‘Shape Self-intersects’ if there are further problems. If so, zoom to where the red box markers are positioned on the spline and either weld these vertices again or delete the problem vertices
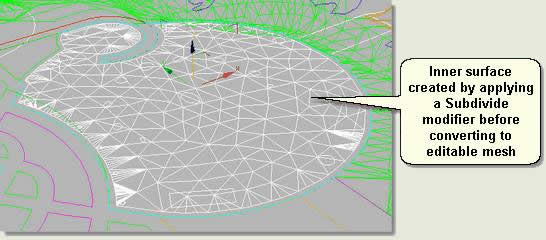
- Apply a Subdivide modifier and enter a value of 1. This divides the surface into more equal faces and stops long thin faces being created
- Convert the surface to editable mesh
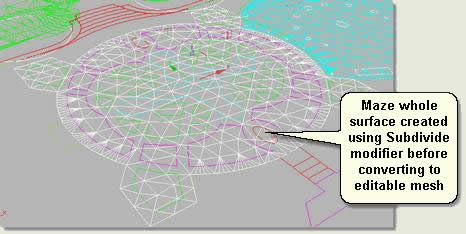
Celtic Maze
- Select Bdy maze whole
- Apply a Subdivide modifier, value 1 and convert to editable mesh
- Use ShapeMerge compound object cookie cutter copy and invert method to create surfaces for Maze inner, Maze outer, Maze mosaic, Flags and Planting beds
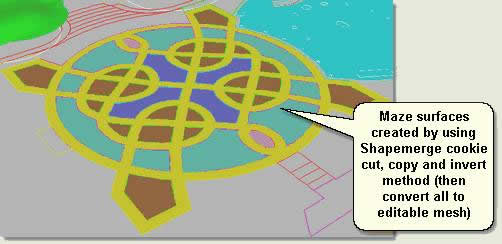
- Create the Flag surface by using the Subdivide modifier and converting to an editable mesh
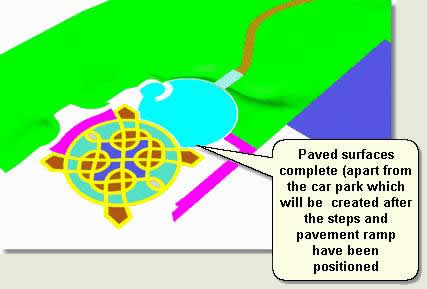
Pavement, Building Path and Bridge
- Create the top pavement surface by subdividing and converting to editable mesh
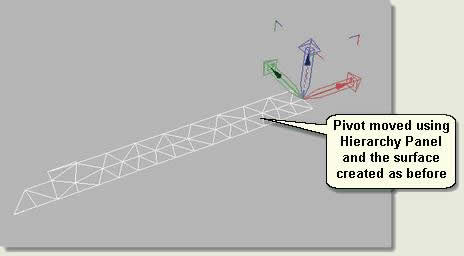
- Select Bdy pavement ramp
- Isolate selection
- Snap the pivot to the top of the ramp where it meets the top pavement. This will be rotated down later from this pivot point position
- Create the pavement ramp surface by subdividing and converting to editable mesh
- Select Bdy building path and create the surface by subdividing and converting to editable mesh
- Select Bridge and apply an Extrude modifier value -.0.1
- Convert the bridge to an editable mesh
NOTE: This tutorial scene sequence has been saved as kf302_01a/b/c/d.max for reference
Donate to CADTutor
If you found this tutorial useful, you might like to consider making a donation. All content on this site is provided free of charge and we hope to keep it that way. However, running a site like CADTutor does cost money and you can help to improve the service and to guarantee its future by donating a small amount. We guess that you probably wouldn't miss $5.00 but it would make all the difference to us.
Local Navigation
Sponsored Links
The Basics
- Dual Dimensions in a Dim…
- UCSICON Options
- "Best of" Basics: Irreg…
- Tool Palette Basics
- Original Dimension Value
- Possible Solutions to th…
- Avoid Using 'Standard' i…
- Shorten the Plot Scales…
- Update the Source File B…
- User Increment Angles fo…
- Drawing Information
- 'Sign Language'
- Rotate with the Copy Opt…
- Use the INSERT Osnap on…
- To or From the Current L…


