
Render Scene Dialog
Introduction
The Render Scene dialog has many settings, only a number of which are commonly used. Below is an explanation of how to set the dialog up for rendering this scene animation (most settings apart from the animation settings apply to stills as well). This tutorial uses the default Scanline Renderer as an introduction to the dialog and settings
- Rendering > Render. On the Render Scene dialog Common Parameters rollout change the settings thus:
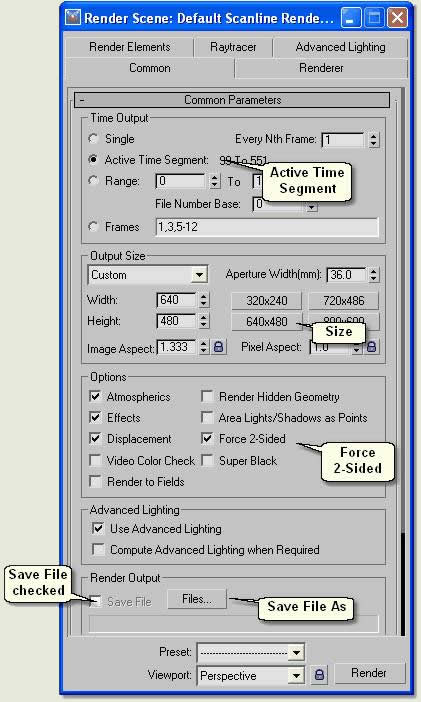
Common Tab
- Time Output > Check Active Time Segment
- Output Size > 640x480
- Options > Check Force 2-sided
- Render Output > Check Save File
- Render Output > Files button > Save file as an AVI file (this needs to be chosen from the file type list as it does'nt default to any file type). Use the default compression when prompted
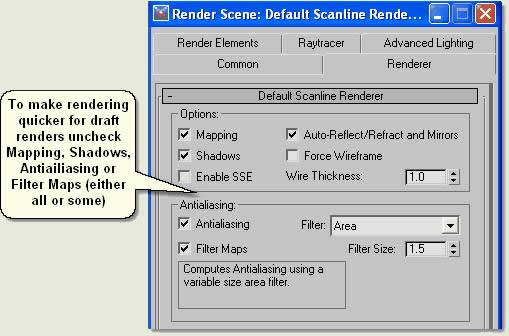
Renderer Tab
To make rendering faster for draft renderings uncheck Mapping, Shadows, Antialiasing or Filter Maps. Experiment to see which settings improve speed the most
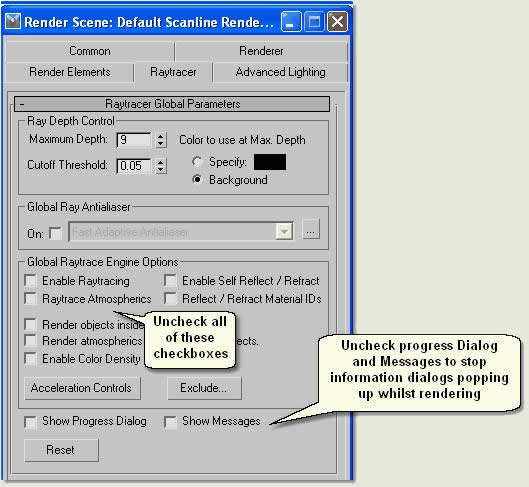
Raytracer Tab
If raytracing is not used then uncheck the following checkboxes:
Render Presets
Presets for all settings used on the Render Scene Dialog can be saved in Render Preset files. Render presets for draft rendering and production rendering can be saved and used again at any time at the click of a button. Render Presets are at the bottom of the Render Scene Dialog. Refer to MAX / VIZ Help for further information
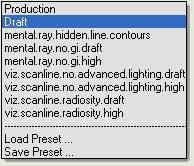
- Setup and save presets for draft and production renders
- Press Render to render the scene, then use the Quick Render icon on the Main Toolbar to render without opening the Render Scene dialog
Donate to CADTutor
If you found this tutorial useful, you might like to consider making a donation. All content on this site is provided free of charge and we hope to keep it that way. However, running a site like CADTutor does cost money and you can help to improve the service and to guarantee its future by donating a small amount. We guess that you probably wouldn't miss $5.00 but it would make all the difference to us.
Local Navigation
Sponsored Links
The Basics
- Dual Dimensions in a Dim…
- UCSICON Options
- "Best of" Basics: Irreg…
- Tool Palette Basics
- Original Dimension Value
- Possible Solutions to th…
- Avoid Using 'Standard' i…
- Shorten the Plot Scales…
- Update the Source File B…
- User Increment Angles fo…
- Drawing Information
- 'Sign Language'
- Rotate with the Copy Opt…
- Use the INSERT Osnap on…
- To or From the Current L…


